Standard Operating Procedure for Winding Conveyor Belt
Required Tools and Equipment:
- A piece of heavy equipment like a telehandler, skid steer, or loader
- A belt winder (if available)
- Battery powered drill/screwdriver
- One small hammer
- Two medium sized adjustable wrenches
- One small sledgehammer
- 2” wood screws
- Spray paint (2 cans, any highly visible color is fine)
- Belt winding cores
With a Belt Winder:
- Begin the roll by nailing the belt to the winding core on the winder.
- If both sides of the belt must be documented (it’s sometimes required for sales of very good quality belting) follow the additional procedure below:
- Take a picture of the face of the belt as it is stretched out on the ground before or slightly after the belt winding begins. To show as much of the face of the belt as possible.
- Take 2-3 pictures of the other face of the belt (the other side of the belt) as it is being wound on the winder. By taking pictures of the belt roll as it is being wound we can take representative pictures of the other side of the belt as well.
- Engage the belt winder and wind the belting. The winder should not be winding very fast. Two to six revolutions per minute is fine.
- Belt roll speed should never exceed 20 RPM.
- The belting will likely snag, or stall, and the belting and winder must be adjusted fairly often to keep the belting winding straight.
- As soon as the belting starts to shift too far in either direction, stop the winder, and re-adjust the belting using heavy equipment to reposition the belting, and the belt winder’s guides to keep it tracking straight.
- Once the belt is completely wound. Take a picture, with a measuring tape in view, of the thickness of the edge of the belt. And a picture, with measuring tape in view, of the width of the belt. Also take a picture of the cut end section of belt (where the belt is cut on the end) to show approximately how much CENTER wear the belt has.
- Spray paint a number on each roll of belt (with green or blue spray paint when available). Numbering proceeds as follows:
- Starting with the first belt we roll or come to. The roll should be numbered with the number 1. Then the second roll is numbered with a 2. The third roll is numbered with a 3 and so on.
- Pictures of this belt will need to be taken. Pictures needed include pictures of:
- WIDTH of belt with measuring tape present in picture.
- THICKNESS of belt with measuring tape in picture.
- END flap of belt showing center wear vs. edge wear.
- FACE of the belt.
- All photos should then be sent to EZA in order for us to give you a good quote.
Without a Belt Winder:
There are countless ways to roll belting without a traditional belt winder. But we will only focus on the methods we know can be effective. Those methods are the following:
- Hand Rolling
- Rolling with Heavy Equipment
- Palletizing
Tools Required:
- Handheld utility knives with large frame for easy handling (box cutters)
- Replacement blades for handheld utility knives (pack of 100)
- Battery powered drill/screwdriver
- 2” Wood screws
- PPE
- Rubber or Leather gloves
Hand rolling belting is only doable for scrap belting in small quantities. This is not usually an option for belt that is reusable. Because in order to be hand rolled, the belting must be cut into small lengths. Usually less than 100’. Which would make the belting difficult to re-use. Steps for hand rolling belting are listed below:
- Separate belting from the belt pile using heavy equipment and chains
- Using heavy equipment and manpower. Stretch all individual pieces of belting out and be sure to remove all the twists and knots.
- Move the flat, untwisted, belting. To a flat smooth area that’s not too muddy.
- Ensure the belting is at a slight decline. Pointing slightly downhill, rather than uphill, prior to beginning roll.
- Begin rolling by folding one end of the belting tightly over onto itself while pushing forward with the material in a rolling motion. Typically two people will push the roll forward in unison at this point.
- Continue pushing the roll and ensure that the belt stays as lined up as possible to make a neat looking roll
- Continue pushing the roll until either the length of belt comes to an end. Or until you can no longer push the roll of material.
- If you can no longer push the roll of material, cut the belting, and screw the loose cut flap down onto the roll.
- Use a battery powered drill and screws designed for wood or drywall to secure the loose flap
- Repeat this procedure until no belting is left to roll
- Clean up any small scrap pieces of rubber using the appropriate bins if needed
Rolling with Heavy Equipment
Tools Required:
- Square tube
- Winding cores or 2×4’s
- Battery powered drill/screwdriver
- 2” wood screws
- PPE
- Sledgehammer
- Heavy Chains with hooks
- Rubber or leather gloves
This method is typically done with two or more people. If you plan to roll belting with heavy equipment, there are some things to keep in mind. The first being that belt rolls must still be started by hand. Once belt rolls are started, they must be made large and tight enough by hand. To roll, rather than slide, when pushed by heavy equipment. The second thing to keep in mind is that the rolls can be very hard to keep on track while pushing with heavy equipment. This will take a very skilled equipment operator. The steps for using heavy equipment to roll belting are included below:
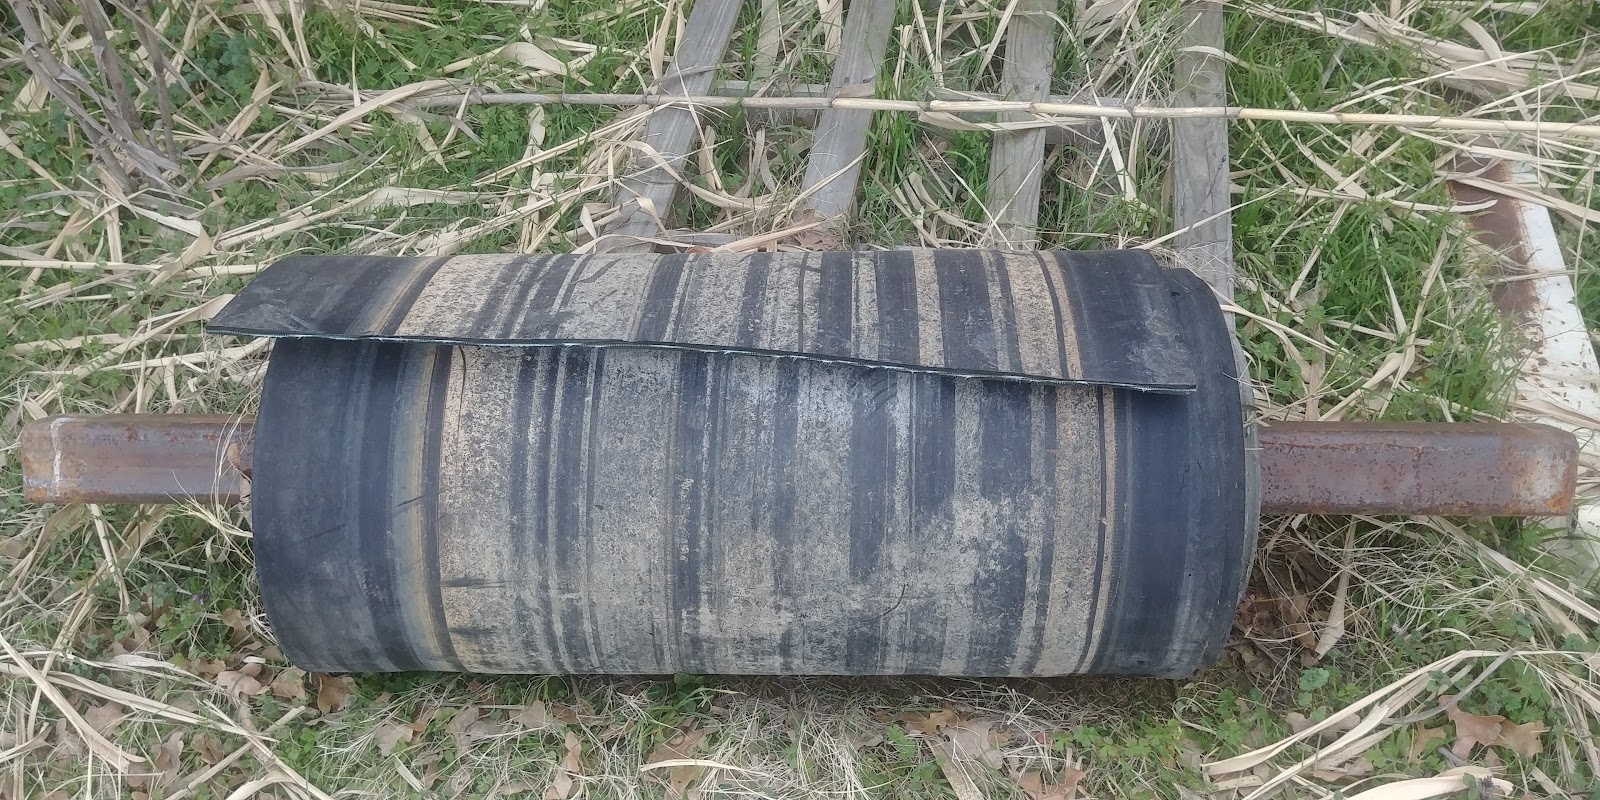
- First begin the roll by attaching the belt to a shaft. This can be done a few ways. One way is by using a square shaft, with round winding cores that have a square center as shown below: {include pictures of belt winding shaft and winding cores}. Another way is to simply use a long length of scrap poly pipe, and screw the belt directly to the poly pipe.

- Once the belting has been attached to a shaft, the roll can be started. To start the roll, simply start pushing the belting forward on itself, ensuring that the roll stays as straight as possible. Once the rolls gets too large to continue pushing, stop hand-rolling the roll.
- Now use the heavy equipment to gently push or pull the roll down itself to continue rolling the belt. This can be done by following the procedure below for various pieces of equipment:
If using a front end loader
- Position the loader behind the roll and very slowly and with control, push the roll with the bucket, so that the roll begins to wind itself up as it rolls forward.
- The roll will likely try to move left or right as it’s being rolled, so you will have to frequently straighten the roll back up to prevent the roll from rolling too far off center in either direction. To straighten the roll, use your heavy equipment to push the roll from one side at a time, until it’s back in alignment.
- Try not to introduce too much slack into the roll during any rolling step, as too much slack will cause the belting to slide on the ground when pushed by heavy equipment, rather than roll up.
- Once a large roll is started, continue the roll until it either gets too large to effectively handle with your heavy equipment, or until it reaches six feet in height.
- Continue this process until all the belting has been rolled.
- NOTES: This method works best on long, wide sections of belting. This won’t work on anything less than 30” wide, or less than 25’ long. This is also a fairly challenging way to roll belting and requires a very skilled and patient equipment operator.
If using a telehandler forklift or other off road forklift
- Use a shaft a to roll the belting by hand as explained above
- Attach chains to either end of the shaft once the belting has been rolled by hand
- Attach the other ends of the chains to either the telehandlers mast, or the back end of the telehandler on the tow/pull points
- Guide the belt forward and use the telehandler’s various steering configurations and mast positions to keep the belt lined up as you push or pull it using the chains and telehandler.
*Side Note:
If there is not enough belting in a single length of belt to make a large roll, add more sections of belting to it using the procedure below:
- First roll up the full length of belting and secure the roll with a few screws as shown:
- Now move the completed roll to the next section of belting that’s prepared to roll, and place it on top of one edge of the belting as if you are starting a new roll
- Screw the end of the next section of belting onto the completed roll, using three to seven screws
- Roll the belt as usual, and continue rolling until the roll either becomes too large to effectively handle with your heavy equipment, or the roll reaches six feet tall
- Repeat this process by moving the roll to the next section of belting, until the roll is too large to effectively handle with your equipment, or the roll is six feet tall
Palletizing belting
When we say “palletizing belting” we mean that we are literally attaching the belting to pallets. This is not typically necessary for full truck load quantities of material, but can be necessary for partial loads, remnant belting, cutoffs, and other belting that won’t roll effectively.
Palletizing can be a laborious process, and can’t be done in all situations. But once belting is palletized, the options for shipping the belting open up significantly. Palletized belting can be shipped via van trailer, flatbed, shipping container, railcar, etc.
There are countless ways to palletize products, but we will focus only on what’s relevant to shipping conveyor belting. The following procedure outlines the necessary steps and equipment required for palletizing belting for shipments:
Tools Required
- Pallets
- Strapping or shrink wrap
- Utility knives and blades
- Battery powered drill/screwdriver
- Heavy equipment, forklift, or pallet jack to move loaded pallets
- Prepare all material to be loaded onto the pallet by rolling or folding the material
- Begin stacking material on the pallet
- Use stretch wrap to keep material wrapped and stacked together as you continue loading the pallet
- Ensure that nothing is hanging off the pallet
- Load the pallet until no more material can fit on the pallet, or until the pallet weighs 4000lbs or more
- Wrap the pallet and belting together with stretch wrap. Ensure that everything is tightly secured together and that the stretch is kept taught as you’re wrapping it.
- Keep wrapping and adjusting until you’re sure the pallet will hold up to being picked up and moved by a forklift
- Continue until all belting has been palletized